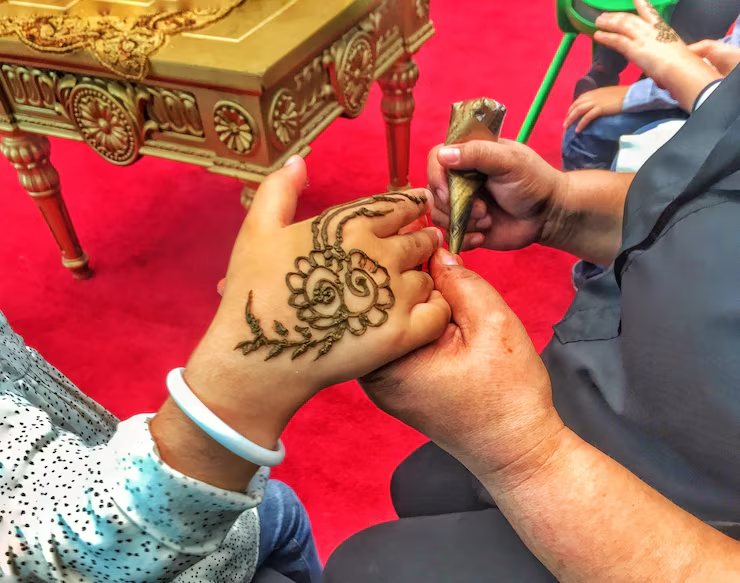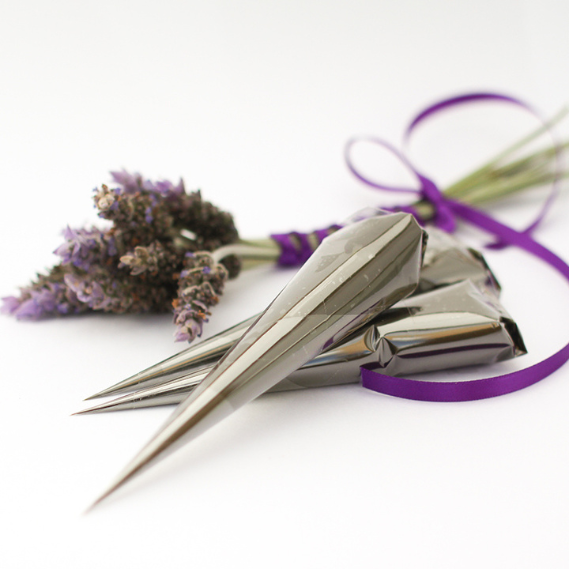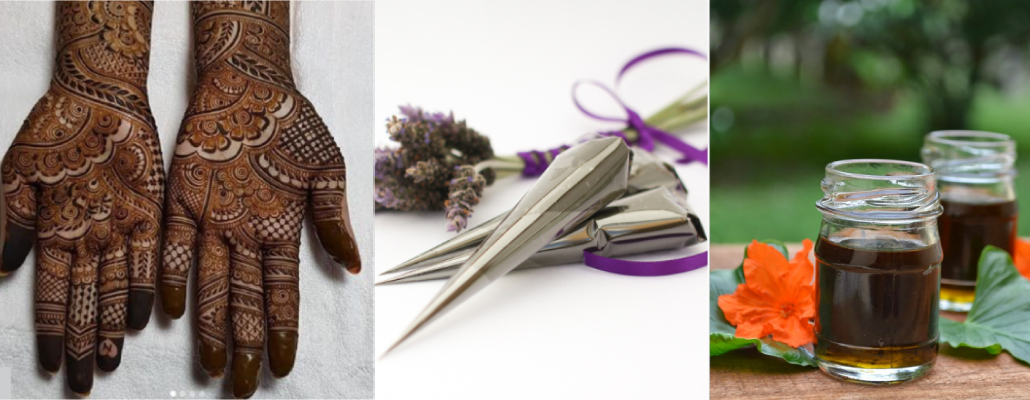
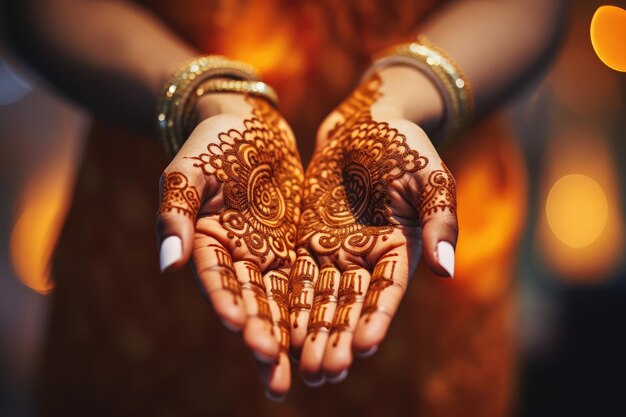
Henna has long held deep cultural roots in weddings and celebrations, especially across South Asian, Middle Eastern, and North African traditions. Today, its intricate beauty and symbolic meanings have found a firm place in Australian weddings, festivals, and personal milestones. Whether it’s a bride’s traditional mehndi night, girls’ gathering, maternity shoot, or school function, henna’s natural, temporary body art brings elegance and connection to any celebration.
More couples and event organisers across Australia are choosing henna as part of their wedding or event experience. It’s not just for tradition anymore. From brides with deep cultural ties to those simply drawn to its detailed patterns and natural charm, henna is being embraced for its versatility and visual impact. Bridal henna can be a centerpiece. For others, it’s a unique way to celebrate connection, joy, or heritage.
At the same time, as henna becomes more popular, clients and first-time users often have a list of questions.
Is it safe to use on sensitive skin?
Will the colour match what I’ve seen on Instagram?
How long will it last through my wedding week?
This guide was created for brides-to-be, event clients, and DIY users who want straight answers—without the guesswork or confusion.
If you’re planning to include henna in your celebration or purchase a DIY kit, this blog will walk you through what really matters: safety, quality, preparation, and realistic expectations. Whether you’re booking a professional artist or planning a henna party at home, you’ll find actionable advice based on real-world experience—not marketing fluff.
You deserve a stress-free henna experience that looks beautiful and feels right for you.
Is Henna Safe for Skin?
The short answer: natural henna is generally safe for skin. But not all products sold as “henna” are created equal. The key is understanding what’s in the mix—and knowing what to avoid, especially for brides, children, and anyone with sensitive skin.
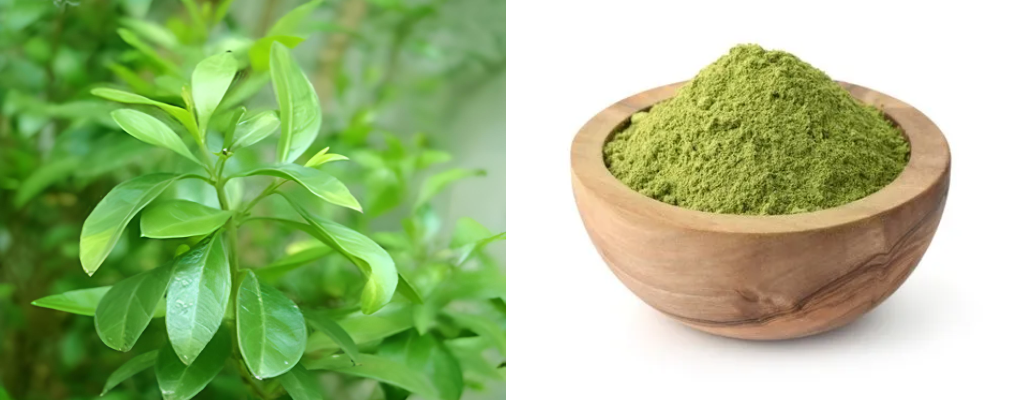
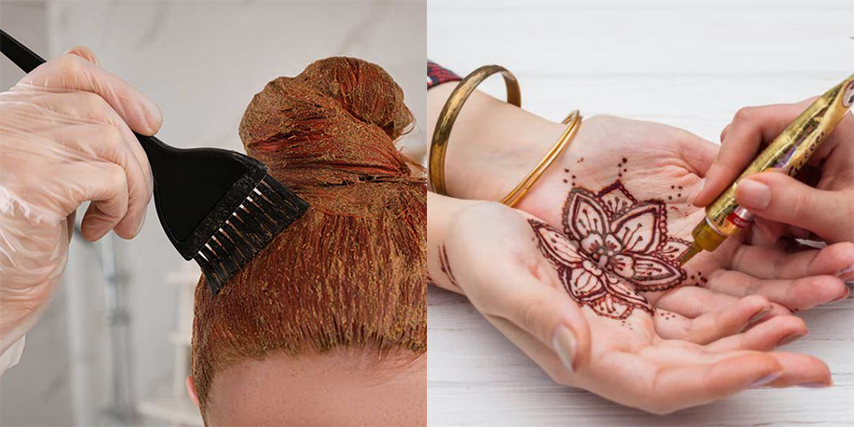
Natural Henna vs. Black Henna
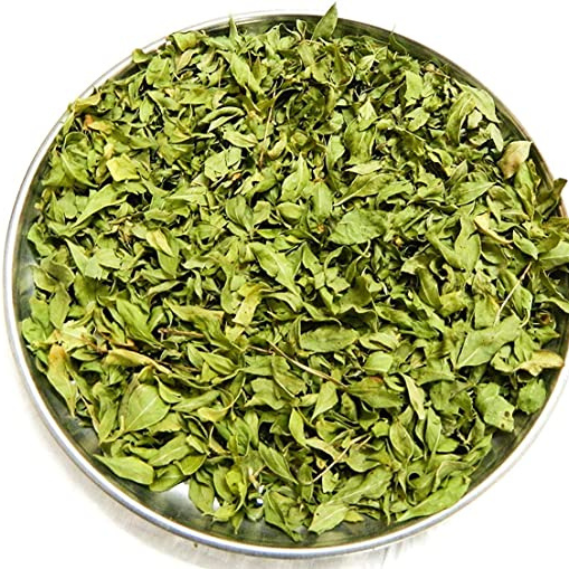
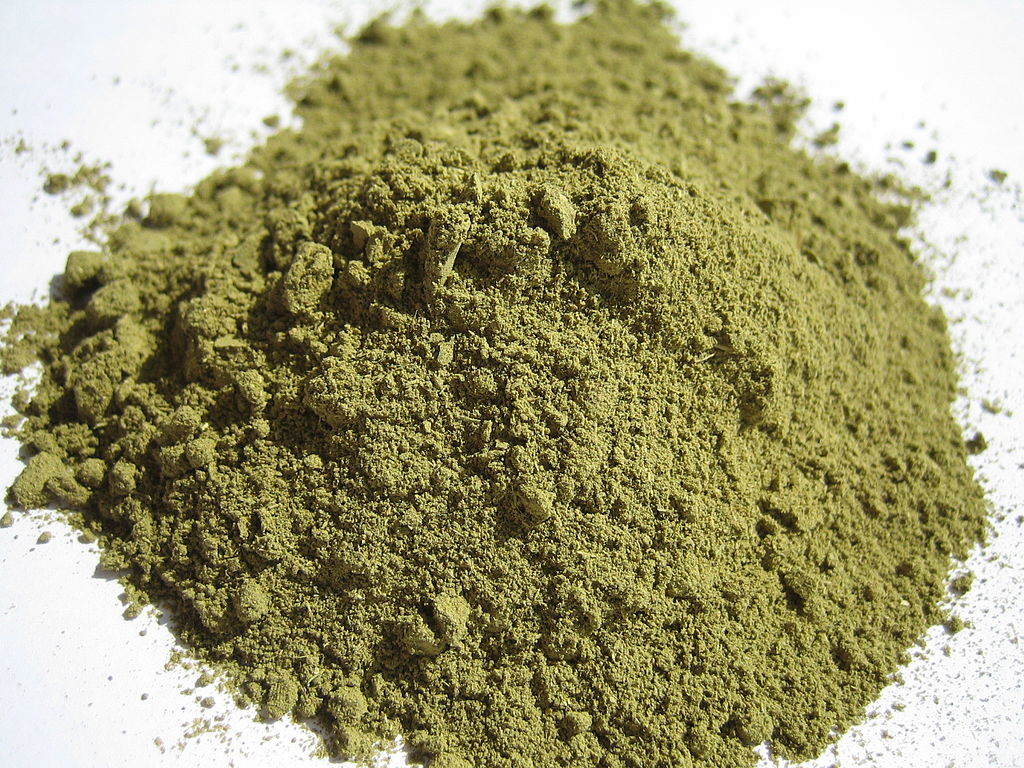
Natural henna is made from the dried and powdered leaves of the Lawsonia inermis plant. It stains the skin in shades of orange to reddish brown, depending on your skin type, where it’s applied, and how it’s cared for. It’s been used for centuries without additives, and when prepared correctly, it’s safe for most people.
Black henna is not real henna. It gets its colour from added chemicals—usually para-phenylenediamine (PPD)—which can cause serious skin reactions. These reactions may result in burns, swelling, and scarring. PPD is not safe for skin use in any concentration commonly found in black henna mixtures.
If it stains your skin jet black within minutes, it’s not pure henna—and it’s not safe.
Allergy Considerations and Patch Testing
Even natural products can cause allergic reactions in rare cases. That’s why a patch test matters for first-time users. If you’re planning bridal henna or buying a DIY kit for the kids, take this simple precaution:
- Apply a small amount of the prepared henna paste to your inner elbow or behind the ear.
- Leave it for at least 20–30 minutes, then rinse off.
- Wait 24–48 hours to monitor for redness, itching, or irritation.
No reaction? That’s a good sign. But take time to test—don’t skip it because you’re on a tight timeline.
Safe Henna Application Guidelines
- Use pure, natural henna only. Look for labels that specify no added dyes, chemicals, or preservatives. If it hasn’t been made fresh from known ingredients, skip it.
- Avoid store-bought tubes with questionable ingredients. Some “instant-dry” cones contain hidden chemical dyes.
- For children, use extra caution. Younger skin can be more reactive. Always do a patch test and choose henna from sources that clearly list their ingredients.
- Talk to your henna artist. If you’re hiring one, ask about their ingredients and preparation process. Any professional should be transparent and happy to explain what’s in the paste.
- Don’t apply on broken or irritated skin. Henna is only meant for clean, healthy skin surfaces.
Safe henna starts with informed choices. Whether it’s your bridal design or your teen’s birthday party, avoid shortcuts and chemical mixes. Your skin will thank you, and your stain will still look stunning.
Common Allergic Reactions and How To Avoid Them
Henna is natural, but your skin’s response still matters. Not every product labeled “henna” is safe, and even natural blends can trigger reactions under the right (or wrong) conditions. Here’s what to watch for—and how to stay in the clear.
Typical Allergic Reactions to Henna
Reactions to natural henna are rare, but not impossible. Most issues arise from adulterated or chemical-laced versions. Symptoms to look out for include:
- Redness or rash at the application site
- Itching or tingling sensation
- Swelling or blistering
- Discomfort that lingers after the paste is removed
If symptoms appear within hours of application, wash the area thoroughly and monitor your skin. Mild cases may resolve with rest and gentle care, but if it worsens, seek medical attention.
Why “Black Henna” Causes Most Problems
Black henna isn’t henna at all. It usually contains para-phenylenediamine (PPD), a chemical dye used in hair colour that can severely irritate or even scar the skin.
If you had a reaction to “henna” that stained your skin dark black within minutes—it was likely a synthetic chemical mix, not the real thing.
For that reason alone, black henna should be completely avoided, especially for weddings, kids, or sensitive skin.
How To Prevent a Henna Reaction
Patch testing isn’t optional—it’s basic skin safety. Especially for brides-to-be, children, or anyone with eczema or allergies, a 48-hour patch test gives you peace of mind before applying a full design.
- Always test new henna paste before use, even if the brand says “natural”.
- Apply a pea-sized amount of paste on clean skin (like the forearm or behind the ear).
- Leave it on for 20 to 30 minutes, rinse off, then wait 1 to 2 days to check for any reaction.
Check the source of your henna. Professional henna artists and reputable retailers should disclose ingredients and offer allergy advice. If the product doesn’t list ingredients, gives off a strong chemical smell, or promises an “instant black” stain, it’s not safe.
Go With Certified Natural Products
DIY kits and ready-to-use cones vary widely in quality. Stick with suppliers who:
- Use lab-tested, 100% pure henna powder with no harmful fillers
- Disclose all added ingredients like essential oils or sugars used to enhance staining
- Pre-mix in small batches with fresh ingredients to limit contamination and bacterial growth
Skin safety is not a wishlist item—it’s a must. Whether you’re a bride, parent, or casual henna fan, avoid chemical mixes and questionable products. The only henna worth wearing is the kind your skin agrees with completely.
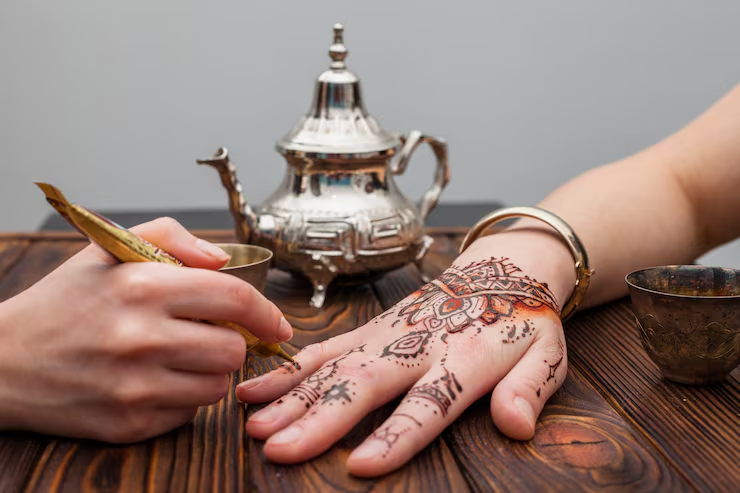
Henna Application Process – What to Expect
Whether you’re booking a professional henna artist for your wedding or applying a design at home with a DIY kit, knowing what to expect can help you get the best results. From the moment the paste touches your skin to the final reveal of the stain, timing and care are everything.
Professional Application
A professional henna artist will start by preparing the skin—usually with a gentle wipe to remove oils and lotions. They’ll then begin freehand drawing or using design templates, depending on the complexity of the work. Bridal designs often cover large parts of the hands, arms, feet, and legs, and can take several hours to complete.
Expect multiple stages:
- Design time: Bridal henna can take anywhere from 2 to 6 hours (or more), depending on the detail and coverage.
- Drying time: Once applied, the paste needs around 30 minutes to start drying. Avoid touching or smudging it during this phase.
- Set duration: To achieve the deepest stain, the henna should stay on for at least 6 to 8 hours. Many wear it overnight.
Professional artists often apply a lemon-sugar sealant to keep the paste moist and in place. You’ll be given instructions on how to care for the design post-application—follow them closely for the best colour payoff.
DIY Henna Application
Using a DIY henna kit at home can be just as rewarding, especially with proper preparation. Clean and dry the skin area first, and plan a time when you can relax during the drying process. Use cones or pre-filled applicators included in your kit to draw your design directly onto the skin.
- Artwork time: Small motifs might take 10 to 20 minutes, while full designs take longer depending on experience.
- Let the paste dry naturally. Avoid fans or heaters that can cause cracking.
- Keep the paste on for several hours. At least 4 hours is recommended. Overnight is ideal for darker stains.
Once ready, scrape off the dried paste gently (don’t wash it off with water). The stain starts light orange and deepens to reddish brown over the next 24 to 48 hours.
Henna Aftercare Tips
Aftercare can make or break your henna stain. To keep the design bold and long-lasting, here’s what matters most:
- Avoid water for at least 12 hours after paste removal. Moisture can lighten the stain during its darkening phase.
- Keep warm. Heat helps activate the dye. Keeping your body warm or gently warming your hands helps intensify the colour.
- Use natural balms or oils. After removing the paste, apply a layer of coconut oil, shea butter, or a henna-specific balm to protect the stain.
- Skip soap for the first day. Don’t scrub the area, and avoid exfoliating products for as long as possible.
The deeper you care, the darker it stains.
For brides, plan your henna session at least two days before the main event to allow the stain to fully develop. For DIY users, timing, patience, and good aftercare make all the difference in stain quality—especially for big days or special occasions.
Henna is more than design—it’s a process. Knowing how it’s done, how long it takes, and how to care for it gives you control over the final result.
Longevity and Fading of Henna
Henna isn’t a one-size-fits-all when it comes to how long it lasts. The final colour and fade rate depend on your skin, body location, application method, and how well you follow aftercare. Whether it’s bridal henna or a festival-style design, here’s what you can realistically expect—and how to make your stain last longer when it matters most.
How Long Does Henna Last on Skin?
On average, natural henna designs last anywhere from 5 to 14 days. The stain starts out light orange after the paste is removed and deepens over 24 to 48 hours into a rich reddish-brown. Then, gradually, it begins to fade as your skin naturally exfoliates.
Things that affect longevity:
- Body location: Palms, soles, and fingertips stain the darkest and last the longest because they have more keratin. Areas with less friction-free skin (like upper arms or back) fade faster.
- Skin type: Oily skin may not absorb henna as deeply. Dry skin absorbs better but needs extra moisture during aftercare to avoid flaking.
- Skin renewal speed: Some people naturally shed skin faster, which speeds up fading.
- Daily activities: Frequent hand washing, swimming, and exposure to harsh soap shorten the life of a stain.
Expect the peak colour between day 2 and day 5, then a slow fade depending on care and skin type.
Tips to Make Your Henna Last Longer
If you want your henna to last through a wedding week, celebration, or back-to-back festival days, every step counts—especially how you prep, set, and protect your stain.
- Start with clean, product-free skin. No lotion, sweat, or sunscreen before application. Oils can block the pigment from penetrating deeply.
- Leave the paste on as long as possible. Aim for a minimum of 6 to 8 hours. Overnight is ideal, especially for bridal designs.
- Keep warm during and after application. Warm skin absorbs the dye better. Cold slows the chemical reaction between henna and keratin.
- Seal with lemon and sugar. Your henna artist may apply this to help the paste stay longer and retain moisture.
- Avoid water in the first 12 hours after removal. This is when the stain darkens. Water can cause patchy or uneven results.
- Use natural oils to protect the stain. Apply coconut oil, shea butter, or a henna-specific balm before bathing, swimming, or using cleaning products.
- Avoid exfoliation. No scrubbing, chemical peels, or anything that speeds up skin turnover if you want to keep the design longer.
When and Where to Apply for Best Results
For bridal or event timing, book your henna session at least 48 hours before the big day. This gives the stain time to mature to its darkest colour. Full development usually happens between 24 to 48 hours after paste removal.
Hands and feet are the classic spots because they give the best, darkest stain—and keep it longer. If you’re using henna for less stain-prone areas like the arms, back, or shoulders, be realistic. The design may look lighter and won’t last as long.
Henna is temporary—but with the right prep and care, your design can hold strong through days of celebration, photos, and fun.
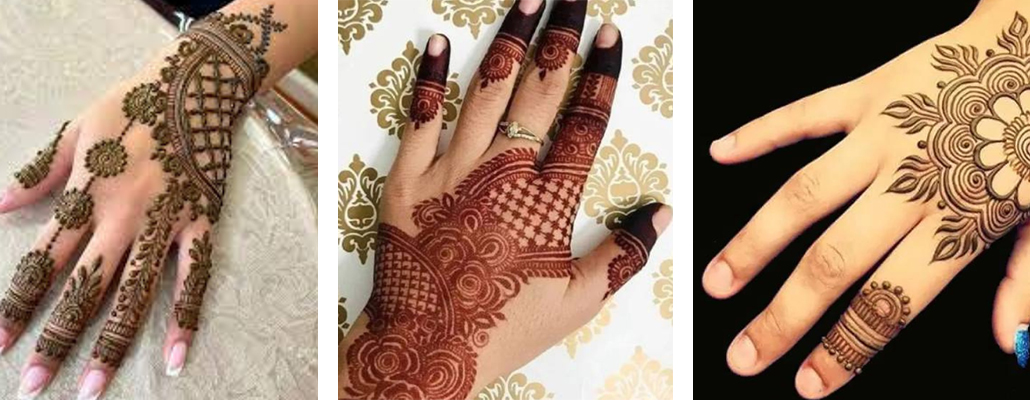
Addressing Concerns About Henna Stain Colour and Quality
One of the most talked-about topics with henna is colour. Brides-to-be often ask why some stains turn out rich and dark, while others stay light or fade quickly. There’s also the occasional worry: “Will it look orange instead of brown?” or “Is this going to leave a permanent mark?”
Let’s clear up the uncertainty so you can move forward with confidence—whether you’re a bride planning a full-back design or a festival-goer trying a DIY kit for the weekend.
What Determines Henna Stain Colour?
Henna doesn’t stain every person exactly the same way. The final colour on your skin depends on a mix of factors—some you can control, and some you can’t.
- Skin type: Henna binds to the top layer of your skin (rich in keratin). Thicker skin, especially on palms and soles, gives deeper and longer-lasting stains. Softer areas like arms and backs often result in lighter colours.
- Body temperature: Warmer body areas help henna develop its colour. Cold hands during and after application can result in faint stains.
- Henna quality: Fresh, natural henna with high dye content produces more intense colour. Old or weak paste won’t give strong results, no matter how well you follow aftercare.
- Aftercare: Moisture, warmth, and timing all affect the final stain. Washing the area too early or using soap right after paste removal can lighten results.
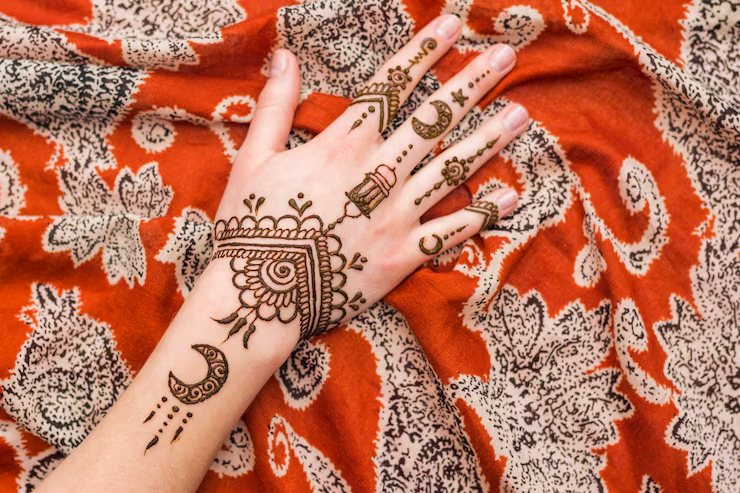
The natural colour range goes from orange (day one) to dark reddish-brown (by day two or three). Anything outside that range—like black or green—signals a problem with the product or ingredients used.
Orange Is Normal at First
When you scrape off the dried paste, your henna design will likely look orange. Don’t panic. This is part of the normal oxidation process.
Over the next 24 to 48 hours, the stain will deepen naturally into a dark reddish-brown. Warmer skin and proper aftercare can speed up the darkening phase. If you’re preparing for a wedding or event, do your henna 2 to 3 days in advance to let the stain reach its full colour potential.
Henna and Permanent Tattoo Fears
No, real henna can’t become permanent. Henna works by staining the outer layers of your skin. As your skin naturally exfoliates, the stain fades. This is why all henna—real, natural henna—eventually disappears completely.
If someone tells you their henna product is “semi-permanent” or “lasts for months,” be cautious. These products may contain chemical dyes or pigments that are meant for fabrics or hair—not for your skin. That’s where the real risk begins.
How to Trust the Stain—and the Artist or Kit
The difference between a rich, dark stain and a faded or patchy one often comes down to ingredient quality and preparation. Whether you’re getting professional bridal henna or using a retail kit, use this checklist before going ahead:
- Does the henna contain only natural ingredients? Avoid anything that lists dyes, preservatives, or chemical names.
- Was the paste made fresh? Henna loses strength over time. That’s why high-end artists mix it in small batches, often just days before your appointment.
- Does the seller list full ingredients? Transparency is a sign of trust. If they can’t tell you what’s inside, don’t use it.
Realistic Expectations for Colour Across Skin Types
People with darker or heavily pigmented skin may see a different result than those with fair or light skin. That doesn’t mean the stain is “weaker”—it simply reflects the interaction of pigment with your existing tone. On deeper tones, henna can appear as a rich auburn or dark rust rather than fire-orange or bright red.
Quality henna is about process, not shortcuts. Natural colour variations are expected. What matters most is using safe ingredients, preparing the skin, and allowing time for the full colour to develop. Whether you’re a bride, a guest, or trying your first DIY kit, knowing what’s normal gives you peace of mind—and better results.
Is Henna Safe During Pregnancy?
Yes, henna can be safe during pregnancy—but only if it’s natural and applied correctly. For pregnant brides or guests, taking extra care with what goes on your skin is more important than ever. Henna is often part of cultural rituals or maternity celebrations, but not all henna products are pregnancy-safe. What matters most is the ingredients.
Choose Pure, Natural Henna Only
The only acceptable option for use during pregnancy is 100% pure henna made from Lawsonia inermis leaf powder. This type of henna is free from chemical dyes, preservatives, or artificial darkeners. It stains the skin in natural shades of red-brown and has been used for generations in traditional prenatal and postpartum care across cultures.
Skip anything labelled as black henna or fast-dye henna. These mixtures may contain para-phenylenediamine (PPD), metallic salts, or other chemical additives that pose a risk—not just to your skin, but potentially your baby as well. The same goes for commercial cones that don’t disclose ingredients or have a chemical smell.
Risks of Non-Natural Henna During Pregnancy
Exposure to chemical-laced products like black henna can cause:
- Skin burns or blisters
- Severe allergic reactions
- Respiratory irritation from inhaling strong chemical vapours
Even without a visible reaction, pregnant skin is often more sensitive due to hormonal changes. Products that wouldn’t normally cause a problem might trigger unexpected irritation or discomfort.
How to Safely Enjoy Henna If You’re Pregnant
- Confirm with your henna artist or retailer that the product is 100% natural. Ask about the ingredients and preparation methods. If they can’t explain what’s in their paste, don’t use it.
- Do a patch test first. Even with natural henna, it’s smart to test a small area on the skin 48 hours before applying a larger design. Pregnancy can shift skin sensitivity, even if you’ve used henna before without issues.
- Avoid applying henna over broken, irritated, or inflamed skin. Let any rashes, cuts, or sensitivity heal before use.
- Steer clear of essential oils you’re unsure of. Some natural henna pastes include oils like clove or eucalyptus to enhance stain, but not all are pregnancy-safe. Stick with henna mixed with gentle, pregnancy-safe oils like lavender or no oil at all.
When in Doubt, Wait or Consult Your Doctor
If you’re unsure about henna use at any stage of your pregnancy, speak to a healthcare professional. Some may advise waiting until after the first trimester. Others may flag specific sensitivities. Every body and pregnancy is different—there’s no one-size-fits-all answer.
Prenatal self-care can include tradition—but not at the cost of safety.
With the right henna product and a cautious approach, it’s possible to enjoy body art that’s meaningful, beautiful, and safe for you and baby.
Henna Kits and DIY Use: What You Need to Know
Doing henna at home can be fun, creative, and personal—whether you’re prepping for a girls’ night in, school craft activity, or a bridal pre-wedding gathering. But the market is flooded with kits that range from excellent to downright unsafe. Knowing what to look for (and what to avoid) is the difference between a stunning design and a disappointing or dangerous experience.
What Makes a Henna Kit Worth Using
Your first filter should always be purity and transparency. A high-quality henna kit should give clear, complete information about what’s in it and how to use it. Here’s a quick list of what to check before buying:
- Natural henna only. The kit should use 100% Lawsonia inermis powder, ideally sifted and fresh. Avoid anything with additives or dyes.
- Ingredient disclosure. Good kits list every ingredient included—from the henna powder to essential oils (like lavender or tea tree) and liquids for mixing.
- Proper packaging. Henna should be stored in airtight packaging, away from light and moisture. Leaky bags, flimsy pouches, or kits that smell chemically are a red flag.
- Clear instructions. Look for kits that guide you through preparation, application, and aftercare using straightforward steps (not marketing fluff).
If the ingredients aren’t listed, skip it. Safe henna should never be a mystery box.
Ideal Contents of a DIY Henna Kit
A trusted kit should include the essentials—not just powder thrown in a bag. Look for the full setup, especially if you’re new to henna or gifting it to someone else.
- High-quality henna powder (pure and finely sifted)
- Mixing liquid (often a citrus blend)
- Essential oil (if included, it should be skin-safe and mild)
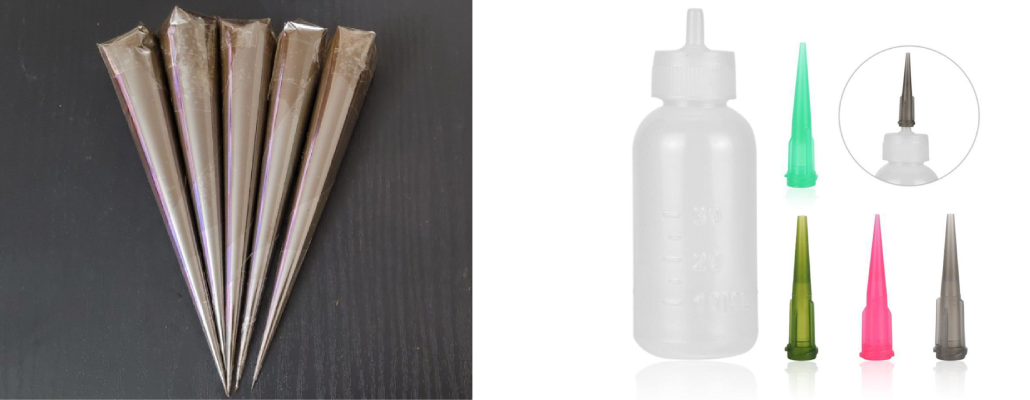
- Plastic cone or applicator bottle for design work
- Gloves and design stencils (optional, but helpful for beginners)
- Step-by-step instructions covering mixing, storage, and application
Ready-made cones are convenient, but be extra cautious—especially if they’re pre-filled and mass-produced with no ingredient list.
Common Pitfalls to Avoid When Using DIY Kits
DIY henna is rewarding, but it comes with some catch points. If you want professional-looking results, watch out for these traps:
- Buying from unverified sellers. Marketplaces can be hit-and-miss. Buy only from trusted, Australia-based suppliers who understand skin safety and import regulations.
- Confusing “black henna” for something stronger. It’s actually harmful. If a kit promises super dark stains in minutes without showing what’s inside, that’s usually a red flag.
- Improper mixing. Too much liquid makes the paste runny and light-staining. Too little dries it out. Follow kit instructions closely or look for demo videos from the seller.
- Skipping prep time. Henna paste needs a few hours (or overnight) to release dye properly before application. Instant use rarely delivers great results.
- Short wear time. Peeling the paste off too soon reduces stain depth. Keep it on for at least 4 to 6 hours for real colour. The longer the better.
DIY doesn’t mean lower standards—it just means you’re in charge.
Who DIY Kits Are Great For
If you’re wondering whether a DIY henna kit is right for you or your event, there are some good fits:
- Henna beginners and hobbyists wanting a safe, hands-on experience
- Parents and teens exploring body art in creative, low-risk ways
- Teachers and activity leaders hosting craft or culture events
- Gift buyers looking for something meaningful and interactive
For bridal use, DIY can be fun for pre-wedding events like henna nights or guest activities—but the main bridal artwork is better left to a professional artist (since detail, symmetry, and stain strength matter most).
Going homemade doesn’t mean going risky. Choose kits that take your safety and results seriously. When the ingredients are pure, the instructions are clear, and the prep is patient—the outcome is worth it.
Henna for Different Skin Types and Tones
Henna doesn’t look identical on everyone—and that’s completely normal. Your skin type and natural colouring play a big role in how your design appears. Whether you have fair, olive, or deep-toned skin, henna can still look beautiful. What shifts is the final shade and how long it lasts. Here’s what to know so you can set the right expectations before your henna appointment or DIY session.
How Skin Tone Affects Henna Stains
Henna stains the top layer of the skin and binds with keratin, but the way it shows up isn’t uniform across all skin tones. Lighter skin may show more contrast between the design and background, making it appear more vivid. On deeper skin tones, the stain may look more subtle but still offers warmth and depth.
- Fair to light skin: Henna initially appears bright orange and deepens to dark reddish-brown within 24 to 48 hours.
- Medium or olive skin: The stain may develop into a warm rust or chestnut brown tone, depending on warmth and placement.
- Deep or richly pigmented skin: Henna often appears as a dark auburn or mahogany colour, blending beautifully with natural undertones.
This variation does not reflect quality of product or application—it’s how natural dye interacts with melanin. It’s important that artists and clients alike understand this so no one feels disappointed by myths about “ideal” henna colour.
Texture and Skin Type Considerations
Beyond tone, the texture of your skin also impacts how henna sets and stains.
- Oily skin: May resist dye absorption slightly, resulting in lighter stains unless thoroughly cleansed before application.
- Dry skin: Typically holds pigment well but can show flaking if aftercare isn’t followed with oils or balm protection.
- Thick skin areas (palms, soles): Absorb henna the best, giving the darkest and longest-lasting stain.
- Thin or fleshy areas (upper arms, shoulders): May produce more muted results and fade quicker due to less keratin exposure.
Managing expectations upfront saves disappointment later. A skilled henna artist or well-informed retail kit guide will explain where best to apply for strong colour, and how to prep the skin to improve results.
Inclusive Beauty, Not One-Size-Fits-All
Henna has always been a global art form, and that diversity should be respected in how we talk about results. Deep skin doesn’t need a neon stain to be beautiful. Light skin doesn’t promise longer lasting colour. The depth, intimacy, and personal meaning of henna sits outside any single colour chart.
Every skin tone can wear henna—it just shows up in its own unique way.
Design Tips for Different Skin Types
If you’re choosing or applying henna, design style can enhance stain visibility across tones:
- Opt for bolder patterns on richly pigmented skin to increase contrast if needed.
- Keep your hand warm post-application to support stronger oxidation on cool-toned or oily skin.
- Layer designs in stages for lighter areas of the body to help create dimension and detail.
Natural variation is part of the beauty of henna. You don’t need identical results to enjoy stunning, safe body art. Focus on clean ingredients, thoughtful technique, and good aftercare—and let your skin do the rest.
Environmental and Cultural Considerations
As henna continues to grow in popularity across weddings, festivals, schools, and private events in Australia, it’s important to stay aware of *how* and *why* we use it. Whether you’re ordering a DIY kit or booking an artist for your event, being mindful of both environmental impact and cultural respect sets the tone for a more meaningful (and responsible) experience.
Eco-Friendly Henna Practices
Natural henna is biodegradable and plant-based, but not all products or processes tied to it are kind to the planet. If environmental responsibility is part of your values—it should be—here’s what to watch for:
- Choose henna with minimal packaging. Look for kits and products that avoid plastic cones or excessive wrapping. Compostable or recyclable packaging is a better choice.
- Buy from local or ethical suppliers. Supporting Australian-based businesses that source ethically or small-scale producers that follow safe farming practices limits carbon footprint and reinforces fair trade.
- Use natural ingredients only. Kits or pastes with synthetic dyes or chemical preservatives are not just risky for skin—they also pollute during production and disposal.
Whether you’re an artist planning dozens of designs or a classroom getting a bulk order of kits, your choices can help reduce waste and favour sustainable suppliers.
Respecting Henna’s Cultural Origins
Henna isn’t just decorative. It originates from centuries-old traditions across South Asia, the Middle East, and North Africa. For many cultures, it holds spiritual or ceremonial meaning, especially in weddings, pregnancies, and religious events. So if you’re borrowing from those roots—do it thoughtfully.
- Do your research. Understand where your chosen design style comes from and what it represents. Avoid sacred motifs unless they’re appropriate for your context or given with guidance.
- Don’t treat it as a costume. Henna isn’t makeup or party flair disconnected from its cultural significance. Using it purely for aesthetic or themed reasons—without awareness or respect—reduces it to trend.
- Ask your artist about their background or design style. Professional henna artists often specialise in distinct traditions (Rajasthani, Gulf, Moroccan, Sudanese). You can respect the art even more by learning about the style being applied.
Appreciation means participation with understanding—not imitation without context.
Incorporating Traditional Designs Respectfully
Including henna in your celebration doesn’t require a cultural connection, but it does require cultural awareness. If you’re a bride-to-be excited by the elegance of henna or a host looking to add a creative detail to your event, consider these steps:
- Choose designs that align with your theme or purpose without mimicking sacred imagery. Floral, geometric, and mandala-style motifs are universal and versatile for all occasions.
- If inviting henna into a multicultural or interfaith ceremony, give credit where it’s due. Mentioning the inspiration behind the practice—whether in a program guide or during speeches—adds context and honours the tradition.
- Hire culturally informed artists. Working with a henna artist experienced in traditional design ensures the artwork is not just beautiful but also applied with skill and cultural integrity.
When in doubt, go with intention and respect.
Good henna practice isn’t just skin-deep. When your approach honours both the environment and the people who’ve kept the tradition alive for centuries, it shows. And that makes the design on your skin even more meaningful.
Common Myths and Misconceptions Around Henna
Henna has become more visible at weddings, parties, markets, and even casual gatherings in Australia—but with wider popularity comes a lot of misinformation. Whether you’ve heard confusing claims online or had a not-so-great experience with a past product, let’s clear up the most common myths that trip people up when it comes to body art with henna.
Myth 1: Henna Stains the Skin Black
This is false. Pure, natural henna stains in a range from orange to reddish-brown. If a product gives a jet-black stain within minutes, it’s not real henna—it’s most likely packed with chemical dyes like PPD, which are unsafe for skin use. The term “black henna” is misleading and often refers to harmful additives that can cause blistering or scarring.
If someone offers you henna that gives instant black results, avoid it. It’s not safer, stronger, or more “advanced”—it’s just dangerous.
Myth 2: All Henna Is the Same
No. Henna quality varies dramatically depending on how it’s grown, harvested, stored, and prepared. The best henna is made from finely sifted Lawsonia inermis leaves, mixed fresh with natural oils and liquids for application. What you find in generic cones at markets or unreliable online shops could contain fillers, old powder, or artificial dyes.
Trust starts with ingredient transparency. One product might give rich colour and zero irritation. Another might barely stain or cause a rash. The label matters.
Myth 3: Anyone Can Mix a Good Henna Paste
In theory, yes—but getting consistent, deep stains takes more than just tossing powder and lemon juice in a bowl. Knowing the right ratios, resting time, and oils makes a major difference. Poorly mixed paste won’t stain well and may dry too fast or flake off, wasting the effort entirely.
If you’re using a DIY kit, start with clear instructions from a reputable source. For events or bridal use, a professional artist knows the prep and timing needed for the best effect.
Myth 4: Henna Is Only for One Culture or Event Type
Henna has roots across many regions—including South Asia, the Middle East, and North Africa—but it’s not limited to one culture or practice. Today it’s used in weddings, maternity art, religious holidays, festivals, and even casual creative gatherings. What matters is the approach.
Using henna respectfully means acknowledging where it comes from—not pretending it has no origin. Whether you’re trying henna for its symbolism or mere aesthetics, appreciate the traditions behind the art.
Myth 5: The Orange Colour Means the Paste Didn’t Work
That orange colour right after you remove the paste? It’s completely normal. Henna undergoes oxidation over 24 to 48 hours. Expect a deepening effect that shifts the colour into reddish-brown or chestnut tones depending on your skin and aftercare.
Orange is not a failure—it’s step one. Give it time, keep the skin moisturised and away from water for the first day, and the final result will speak for itself.
Myth 6: Henna Can Be Permanent
Henna is always temporary. The dye only binds with the top layer of skin, which sheds naturally over time. Most stains last between 5 to 14 days, depending on body placement and care. If something leaves visible marks for weeks or months, it’s not natural henna—and could be scarring or synthetic pigment.
Real henna fades, safely and naturally. Permanent results indicate a different product entirely—and usually not a safe one.
Myth 7: You Don’t Need a Patch Test If It’s Natural
Natural doesn’t mean risk-free. Just like with essential oils or cosmetic products, everyone’s skin reacts differently. Allergies, sensitivities, and skin conditions like eczema can make even gentle ingredients reactive.
Always do a patch test 24 to 48 hours before full application. Safety and confidence go hand in hand—especially for important events like weddings or pregnancy celebrations.
Truth Wins When You Ask The Right Questions
Don’t let misinformation keep you from enjoying henna—or worse, put your skin at risk. Whether you’re planning your bridal mehndi, buying a kit for a teen, or booking group henna for an event, base your choices on facts, not assumptions.
- Check what’s in the paste.
- Know what natural henna looks and smells like.
- Understand what results to expect from your skin tone, location, and care routine.
Confidence around henna starts with knowledge. When you cut through the myths, the real beauty of the tradition shines even brighter.
Conclusion: Making Informed Choices About Henna
Choosing to include henna in your celebration—whether you’re a bride planning your special day, an event organiser hosting a cultural function, or a DIY enthusiast creating art at home—comes down to preparedness, safety, and respect.
We’ve covered it all:
- Why natural henna is the only safe choice for skin
- How to recognise and avoid chemical-based products like black henna
- Steps to prevent allergic reactions (patch testing and ingredient checks)
- What to expect during application and aftercare
- How stain depth and longevity vary by person, location, and prep
- The truth behind red flags, myths, and misconceptions
- How accessories like henna kits can be used safely at home
- Respectful use across different skin tones, cultures, and occasions
- Eco-conscious and culturally informed practices that matter
Armed with the right information, you’re in control—from the product you select to the way you experience and share the artform.
Whether you’re walking down the aisle, setting up stalls at a festival, teaching teens about traditional body art, or simply decorating your hands for fun, make your henna choices based on clarity—not convenience.
Reliable henna isn’t complicated—it’s intentional. Clean ingredients. Transparent sourcing. Skilled application. Informed care. These are what turn a worry into wonder.
Confident skin. Guilt-free art. Safe, stunning results. That’s the experience you deserve—however you choose to enjoy henna in 2025.